Menambahkan IP Address Secara Manual ke Dalam Jaringan Wireless

December 31, 2017 Add Comment
Langkah-langkah pada trik yang berikut ini dapat Anda terapkan untuk menambahkan alamat IP sebuah komputer klien secara manual ke dalam sistem jaringan wireless melalui halaman pengaturan konfigurasi router yang Anda gunakan. Berikut caranya:

Memasukan IP Destination Network dan Gateway


  1. Aktifkan opsi Advanced terlebih dahulu.
  2. Pada sidebar Advanced, klik opsi Routing dan pilih Static Routing di menu konteks. Tampilan halaman akan tampak seperti pada gambar berikut.
  3. Masukkan alamat IP komputer klien pada kotak teks New Destination IP, lalu isikan alamat akses router yang Anda gunakan ke dalam kotak teks Gateway.
  4. Simpan pengaturan tersebut dengan menekan tombol Apply dan klik opsi Save.

Menambahkan Nama Network SSID

December 30, 2017 Add Comment
Menambahkan nama jaringan wireless atau SSID network connection ke dalam sistem komputer klien dimaksudkan untuk memudahkan akses komputer tersebut ke dalam sistem jaringan di waktu yang lain. Ini sangat sesuai diterapkan bagi Anda yang menggunakan perangkat komputer sejenis laptop dan PDA.

Langkah-langkah untuk melakukannya sangat mudah. Lakukan trik yang kami berikan berikut ini:

  1. Klik kanan pada ikon Wireless Network Connection yang terdapat pada system tray, lalu pilih opsi View Available Wireless Networks di menu konteks.
    Memilih Opsi View Available Wireless Networks di Menu Konteks Ikon Wireless Network Connection
    Memilih Opsi View Available Wireless Networks di Menu Konteks Ikon Wireless Network Connection
  2. Selanjutnya, klik link Set up a wireless network for home or small office di sidebar Network Tasks dalam kotak dialog Wireless Network Connection.
  3. Lanjutkan dengan menekan tombol Next pada kotak dial Wireless Network Setup Wizard yang muncul pertama kali.
    Kotak Dialog Wireless Network Setup Wizard
    Kotak Dialog Wireless Network Setup Wizard
  4. Pada kotak dialog berikutnya, aktifkan tombol radio opsi Set up a new wireless network
    Mengaktifkan Tombol Radio Opsi Set Up a New Wireless Network
    Mengaktifkan Tombol Radio Opsi Set Up a New Wireless Network
  5. Klik tombol Next sesudahnya.
  6. Pada halaman Create a name for your wireless network ketikkan nama SSID yang Baru ke dalam kotak teks Network name (SSID).
  7. Untuk memudahkan pengaturan, aktifkan tombol radio Automatically assign a network key (recommended).
    Pengaturan Nama SSID dan Opsi Lainnya di Halaman Create a Name For Your Wireless Network
    Pengaturan Nama SSID dan Opsi Lainnya di Halaman Create a Name For Your Wireless Network
  8. Klik tombol Next untuk melanjutkan.
  9. Setelah itu, aktifkan opsi Use a USB flash drive (recommended) pada halaman pengaturan How do you want to set up your network? Ini bertujuan untuk menyimpan konfigurasi pengaturan jaringan wireless pada media USB flash disk.
    Tampilan Halaman Pengaturan How Do You Want To Set Up Your Network?
    Tampilan Halaman Pengaturan How Do You Want To Set Up Your Network?
  10. Tekan tombol Next dan ikuti petunjuk-petunjuk pengaturan selanjutnya.
Jika proses pengaturan berjalan dengan benar dan komputer Anda berada dalam area hotspotjaringan wireless yang dimaksudkan, Anda akan mullah terhubung dengan sistem jaringan tersebut.

Mengaktifkan Password pada Dynamic Routing dan Windows Firewall

December 30, 2017 Add Comment
Selain mengaktifkan pengaturan kata sandi pengguna atau password pada sistem konfigurasi router, Anda pun dapat melakukan hal yang sama terhadap sistem dynamic routing.

Caranya dapat Anda simak melalui trik yang satu ini:

  1. Aktifkan opsi Advanced hingga tampilan halaman terlihat seperti pada gambar berikut.
  2. Klik opsi Routing pada sidebar Advanced, dan pilih Dynamic Routing.
     Memilih Dynamic Routing dari Menu Konteks yang muncul pada Opsi Routing

    Memilih Dynamic Routing dari Menu Konteks yang muncul pada Opsi Routing
  3. Pada halaman Dynamic Routing, aktifkan kotak cek Enable Password.
  4. Ketikkan kata sandi yang diinginkan dalam kotak teks Password.
  5. Secara berturut-turut, tekan tombol Apply dan link Save Settings agar pengaturan yang Anda lakukan tersimpan dalam sistem.
  6. Terakhir, tekan tombol OK pada kotak dialog pesan.


Mengaktifkan Windows Firewall


Windows Firewall
Windows Firewall

Selain software antivirus dan sejenisnya, Anda dapat mengamankan sistem jaringan wireless dengan menggunakan atau mengaktifkan aplikasi proteksi yang dikenal dengan sebutan firewall.

Kegunaannya adalah sebagai aplikasi yang mendeteksi dan memproteksi arus lalu lintas data, baik yang keluar maupun masuk ke dalam jaringan atau komputer klien. Sesuai dengan namanya, aplikasi ini berstatus sebagai satpam di garis depan sistem jaringan Anda.

Bagi para pengguna sistem operasi seperti Windows, pihak Microsoft selaku produsen telah menyertakan aplikasi firewall dalam paket instalasi sistem operasi tersebut. Secara default, aplikasi tersebut otomatis diaktifkan pada saat Anda meluncurkan Windows pertama kali. Namun demikian, jika Anda ingin mengaktifkannya secara manual, ikuti trik yang kami sajikan berikut ini:

  1. Luncurkan jendela Control Panel terlebih dahulu.
    Tampilan Control Panel
    Tampilan Control Panel
  2. Pilih ikon Security Center.
  3. Pada jendela aplikasi Windows Security Center, klik ikon Windows Firewall.
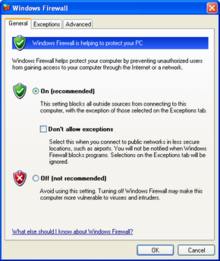
  4. Setelah kotak dialog Windows Firewall muncul, aktifkan tombol radio On (recommended) yang terdapat pada Tab General.
    Windows Firewall
    Windows Firewall
  5. Akhiri dengan menekan tombol OK.

Sekarang, sistem operasi Windows dan jaringan wireless Anda telah terproteksi dengan aplikasi firewall.

Mengaktifkan Fitur DHCP (Dynamic Host Configuration Protocol) Wireless Card

December 30, 2017 Add Comment
DHCP yang merupakan kependekan dari Dynamic Host Configuration Protocol adalah sebuah fitur yang bisa memberikan sebuah alamat IP pada piranti wireless. Sebagian besar wireless card atau Wi-Fi adapter secara otomatis telah mengaktifkan fitur DHCP ini.

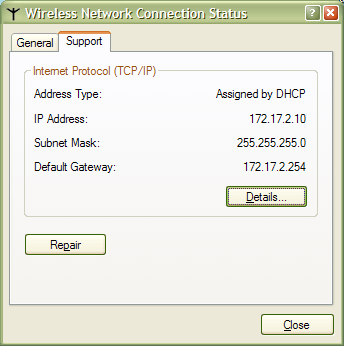
Tampilan IP Address dari Fitur DHCP

Bila Anda sebelumnya telah menggunakan mode pengaturan IP Address statis dan ingin menggunakan fitur DHCP untuk memperoleh IP Address secara otomatis tanpa melakukan konfigurasi, ikuti langkah singkat berikut ini.

  1. Klik Banda ikon Wireless di sudut kanan bawah.
  2. Pada kotak dialog Wireless Network Connection Status yang muncul, pilihlah tombol 
  3. Pilih opsi Internet Protocol (TPC/IP) pada kotak dialog berikutnya, lalu klik tombol Properties.
  4. Pada kotak dialog Internet Protocol (TPC/IP) Properties yang muncul, aktifkan opsi Obtain an IP Address Automatically.
    Mengaktifkan opsi obtain an ip address automatically
    Mengaktifkan opsi obtain an ip address automatically

  5. Jika sudah, klik tombol OK.

Cara Menambahkan Printer pada Jaringan Wireless

December 30, 2017 Add Comment
Ada dua cara yang bisa ditempuh untuk menambahkan printer ke dalam jaringan wireless. Berikut penjelasannya.

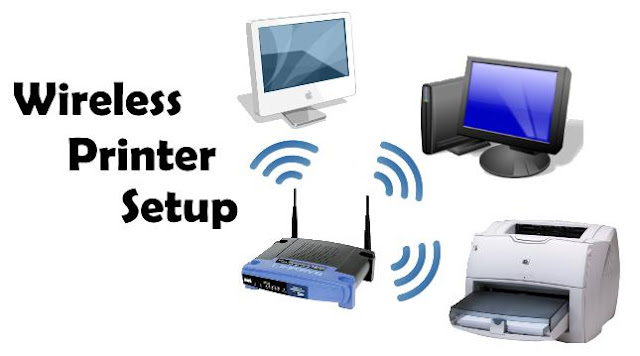
wireless printer set up

Menghubungkan ke Komputer

Cara paling mudah dan murah untuk menambahkan printer ke dalam jaringan wireless adalah dengan menghubungkan printer tersebut ke salah satu komputer dalam jaringan. Komputer yang tetah terhubung dengan printer ini selanjutnya harus berada dalam kondisi hidup agar komputer lain dalam jaringan tersebut bisa menggunakan printer.


Print Server

Print Server
Print Server

Cara lain untuk menambahkan sebuah printer ke dalam sebuah jaringan adalah dengan menggunakan piranti Print Server. Beberapa Print Server bahkan memiliki kemampuan untuk menghubungkan beberapa printer sekaligus dalam sebuah jaringan. Untuk jaringan wireless, pilihlah Print Server yang secara khusus bisa digunakan dalam jaringan ini. Untuk menghemat biaya, cobalah untuk mencari Print Server yang dijual bersama dengan Wireless Access Point dan kabel/ DSL Router dalam satu paket.


Tips Seputar Proteksi dan Keamanan Jaringan Wireless

December 30, 2017 Add Comment
Masalah proteksi dan keamanan merupakan hal yang sangat vital dalam dunia jaringan komputer. Bukan saja dibutuhkan kemampuan untuk menghalangi penyusup seperti cracker (criminal hacker), sistem jaringan komputer jugs tidak terlepas dari ancaman penyebaran virus, Untuk itulah, Anda perlu mengetahui trik-trik yang dibutuhkan dalam mengatasi serta meningkatkan keamanan sistem jaringan wireless yang Anda bust.

Memproteksi Pengaturan Router dengan Password

Pada umumnya, router telah menetapkan 192.168.1.1 sebagai alamat IP untuk mengakses sistem konfigurasi secara default sehingga dapat diakses dengan mengetikkan alamat tersebut pada kotak alamat program browser.

Mengakses Alamat IP 192.168.1.1 Melalui Program Browser Internet

Oleh sebab itu, kami memberikan hal tersebut sebagai trik pertama yang harus Anda ketahui pada pembahasan kali ini. Lebih jelasnya, dapat Anda simak lewat langkah-langkah yang kami berikan berikut ini:


  1. Pastikan Anda telah mengakses alamat 192.168.1.1 melalui program browser Internet untuk menampilkan halaman depan pengaturan sistem router Anda.
  2. Jika sudah, pilih opsi Advanced.
  3. Lantas, pilih opsi System Password ketika halaman Advanced telah terbuka.
  4. Pada halaman berikutnya, aktifkan kotak cek Enable Authentication.
  5. Masukkan nama dan kata sandi pengguna pada kotak teks User Name, Password dan Confirmed Password.
  6. Akhiri dengan menekan tombol Apply.
  7. Selanjutnya, kotak dialog berikut akan ditampilkan.
  8. Tekan tombol OK untuk melanjutkan dan ikuti dengan memilih opsi Save Settings guna menyimpan hasil pengaturan.
  9. Selanjutnya, kotak dialog pesan peringatan ditampilkan. Akhiri dengan menekan tombol OK.


Agar semua hasil pengaturan yang sudah Anda lakukan dapat langsung dijalankan oleh sistem, pastikan Anda menekan tombol Restart Router terlebih dahulu. Hasilnya, program browser akan melakukan refresh dan menampilkan halaman login seperti yang tampak pada gambar berikut.

Keamanan pengaturan sistem router jaringan wireless Anda telah terjaga dengan adanya halaman login yang mengharuskan setiap pengguna untuk memasuk-kan kode akses yang sesuai.

How to Speed Up Android Phone Without Rooting

December 29, 2017 Add Comment
Now the android system is a developing and there are more users to Android when compared to other software.

More users mean more applications. Android is developed because of these applications and some of them cause problems to android phone. They will slow down your phone and then we will need to speed up your android phone.

When you buy an android phone you will be very happy but, after using the android for 6 months, the Android mobile will hang, freeze etc.

So, to speed up your android phone like before ( when you buy android first), you will have to use the below tips. Now we will see how to speed up your android phone without rooting.

speed up Android phone without rooting


How to Make Android Phone Run Faster Without Rooting


Using An Antivirus 

Everyone says that every android user must have an antivirus for android. An antivirus is a must have app for Android.

When you download apps from a third-party site. Your phone will get affected and this will make your android slower and slower.

When you fix the virus files then your phone will run at normal or super speed. So deleting virus files will speed up your android phone without rooting.

Always Clear The Cache

Clearing the cache of apps will make your Android faster. Use an app like app cache cleaner to clean the cache of your apps.

Do not clear the cache of browsers and maps. Cache will make your browsing faster and take less time to load the maps. So don’t clear the cache of browser and maps. But clear the cache of all apps to speed up your android mobile without root.

To clear the cache of apps:

1. Go to settings.

2. ‎Scroll and click on apps.

speed up Android phone without rooting


3. ‎ Click the app you want to clear cache.

4. ‎Then click on clear cache.

speed up Android phone without rooting


Free Up Internal Storage 

Using more internal space will make your phone slower. Delete unnecessary apps and files on internal storage or move them to memory card. Keep your phone internal storage on limit.

You can use es file explorer’s sd card analyst to analyze the files and folders and give you a report about your phone storage and say which folder is consuming more storage.

If the folder in the list is unnecessary to delete the folder or files to save storage. This will make your Android run faster.

Some files in the list of es are DCIM folder. This is a folder where the photos taken from your phone will be saved in this folder.

So, what is the junk? The thumbnails are junk. This will consume a massive space up to 100 MB easily. So, delete thumbnails regularly to speed up your android phone without root.

Suggested: How To Increase Gaming Performance On Android Without Root

Stop Background Running Apps

Stop the apps running on background. It will make your android faster and save your battery of your mobile.

Always use back button only to close apps don’t use minimize button. Using minimize button will make an app running background and consume ram and battery. To stop running apps on android you can stop them using task manager. This is the main task to speed up your android phone without root.

Do Not Use Live Wallpaper 

Do not use live wallpapers. Using live wallpapers will make your android slower and also consume battery. Using a general wallpaper will make your Android run faster.

Live wallpapers will also run in background to make your phone lag. So, don't use it.

Over To You

So, these are the tips to speed up android smartphone without rooting. If you use another trick, then share with us. And subscribe to our blog to get latest updates first. 

Mengenali Faktor Penghambat Sinyal Wireless

December 29, 2017 Add Comment
Dalam sebuah jaringan wireless, beberapa material yang digunakan dalam sebuah bangunan dapat menghambat sinyal. Agar Anda mengetahui seberapa besar hambatan yang ditimbulkan oleh benda-benda yang berada dalam jaringan wireless, berikut ini kami sajikan beberapa material dan besarnya hambatan yang ditimbulkannya.

Memilih Antena

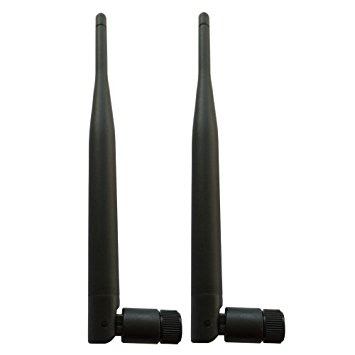
Antena dalam sebuah jaringan wireless tergolong sebagai piranti tambahan. Piranti ini digunakan untuk memperkuat sinyal sehingga pars pengguna jaringan wireless menjadi lebih nyaman karena bisa menerima sinyal yang kuat. Piranti ini juga tersedia dalam beberapa tipe. Berikut ini kami sajikan beberapa tipe antena untuk memudahkan Anda menjatuhkan pilihan.


Antena Omni-Directional

Antena Omni-Directional

Antena Omni-Directional


Antena ini memiliki arah pola pancaran 360°. Antena ini digunakan untuk memancarkan sinyal ke segala arah.

Antena Parabolic (Dish)

Antena Parabolic (Dish)

Antena ini memfokuskan sinyal ke arah tertentu. Biasanya, antena ini digunakan untuk jaringan Point-to-Point antara gedung.

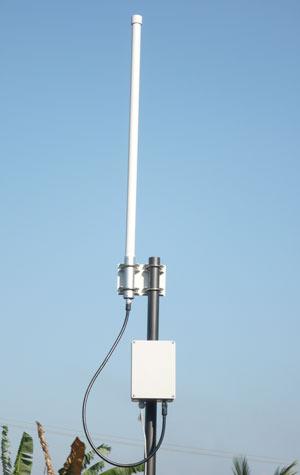
Antena Rod

Antena ROD
Antena ROD

Antena ini memancarkan sinyal 360°. Penempatan secara horizontal atau vertikal juga akan berpengaruh terhadap pancarannya. Tiang penyangga yang cukup tinggi bisa menghasilkan pancaran yang bagus. Biasanya, tipe ini digunakan pada jaringan wireless di rumah atau kantor kecil.

Antena Sectorized

Antena Sectorized
Antena Sectorized

Antena ini mirip dengan tipe antena rod, tetapi hanya bisa meman-carkan sinyal 90°. Seperti halnya antena rod, antena ini juga digunakan untuk beberapa point.

Setting IP Address Statis di Wireless Card

December 29, 2017 Add Comment
Bila Anda mengaktifkan  fitur DHCP, secara otomatis wireless card akan memiliki sebuah IP Address. Jadi, Anda tldak perlu melakukan pengaturan lagi. Namun, bila Anda ingin mengatur IP Address yang spesffik di masing-masing komputer pada sebuah jaringan wireless, lakukanlah pengaturan IP Address statis untuk setiap komputer, Caranya sebagai berikut.

  1. Kiik Banda ikon Wireless di sudut kanan bawah tampilan layer komputer Anda.
  2. Pada kotak dialog Wireless Network Connection Status yang muncul, pilihlah tombol Properties.
  3. Pada kotak dialog Wireless Network Connection Properties yang muncul, piiih opsi Internet Protocol (TCP/IP).
  4. Klik tombol Properties.
    Memilih Opsi Internet Protokol TCP/IP
    Memilih Opsi Internet Protokol TCP/IP
  5. Pada tampilan kotak dialog Internet Protocol (TPC/IP) Properties yang muncul berikutnya, pilihlah opsi Use The Following IP Address. Lakukan pengaturan berikut ini.
  • Dalam kotak teks IP Address
Masukkan alamat IP wireless card Anda. Jika Anda telah menggunakan pengaturan statis untuk wireless router dengan alamat IP 192.168.1.1, masukkan alamat IP 192.168.1.2 untuk wireless card di komputer yang pertama. Selanjutnya, gunakan alamat IP 192.168.1.3 untuk wireless card di komputer kedua, 192.168.1.4, dan seterusnya secara ber-urutan untuk komputer berikutnya.
  • Dalam kotak teks Subnet Mask
Masukkan Subnet Mask jaringan. Pada jaringan yang diba-ngun dalam sebuah rumah atau kantor kecil, gunakan Subnet Mask 255.255.255.0.
  • Dalam kotak teks Default Gateway
Masukkan alamat IP wireless router yang Anda gunakan.
Tampilan Pengaturan IP Address
     6. Jika sudah, klik tombol OK.

Sebagai catatan, bila Anda mengubah alamat IP wireless card ini dengan menggunakan konfigurasi statis, Anda juga harus melakukan konfigurasi ulang pada wireless router agar alamat IP wireless card yang baru tersebut dapat dikenali. Selain itu, bila Anda menggunakan konfigurasi IP Address wireless card dengan menggunakan mode statis, Anda juga harus menggunakan mode pengaturan statis pada wireless router.

How to Index New Post Quickly In Google In 1 Minute

December 29, 2017 Add Comment
Crawling and indexing are the important sections in blogging. Without being crawled by major search engines like Google, Yahoo, Bing, All your quality content cannot be found anywhere other than you.

Imagine the world of blogging, without getting indexed by Google. So we must monitor our blog's indexing. If your blog is not getting indexed properly, you will have to face problems in future.

In this post, I am going to share a simple trick to get your post indexed quickly in 1 minute by google.

Why Do We Need to Index Our Site Manually?


Google takes some time approx. 24-48 hours to index your new post. If you are writing a tutorial about something, you can easily wait for sometime to get indexed by Google.

Buf if your blog is a real-time update or News blog, you must take care of getting indexed.


For example, you got a news about Google's new Algorithm and written about on your blog. All your competitors also wrote about in their blogs. After an hour his blog got indexed and he got so many page views and making good money with Google Adsense. But what about you, No traffic and No money for you.

To get your new post indexed quickly in Google in 1 minute, follow this guide.

How to Index New Post Quickly In Google In 1 Minute


1. Go to Google search console. You must have verified your blog with Search console to use this trick. Otherwise, learn how to add and verify a blog with Google Search Console.

2. Select your blog and go to Google Crawl.

3. Select the Fetch As Google tool in the list.

index new post quickly in Google in 1 minute


4. Input the URL of your post without your blog URL. For example, the URL of the post is example.com/example-trick-to-use.html. Then you will have to add example-trick-to-use.html.

5. Then click on Fetch.

index new post quickly in Google in 1 minute


6. Click on request indexing.

index new post quickly in Google in 1 minute


7. Then complete the small challenge and click Go again.

index new post quickly in Google in 1 minute


Using this simple trick, you can index your new post within 1 min of clicking fetch.

So what happened? 

After you click fetch, The GoogleBot ( crawling bot for Google ) receives the message to crawl your site. GoogleBot visits your site and indexes your post if it has no SEO violations.

If your post isn't crawled within 30-60 min of time. Recheck the post, Seo setting etc. Make sure that your blog and post allowing GoogleBot to crawl and index properly.


How to Get Properly Indexed By Google (some well-known tips )


1. Update your site regularly with content.


GoogleBot visits many blogs including you daily. If GoogleBot found that your blog is not getting updated, It will stop visiting you and put your blog down in search results. So write new posts daily. If you don't get any ideas, just update the old articles to get whitelisted by GoogleBot.

Build some backlinks


Building backlinks improve the SEO of your blog. Backlinks are essential for proper indexing of your blog. While bots visiting a blog, and the blog connects to your blog ( by link building ), GoogleBots visit your blog and you will get indexed by the search engines.


Conclusion

This is a simple trick to index your blog. This is a trick to get your new post indexed in 1 minutes by Google. Which trick do you use to get indexed? Please share with our community.

If you need some more tricks and tips, just subscribe to us. 

Cara Instalasi Wireless Router di Luar Ruangan

December 28, 2017 Add Comment
Jaringan wireless tidak hanya bisa menjangkau area-area di dalam rumah atau kantor. Anda jugs bisa memperluas jaringan wireless ke luar rumah sehingga Anda bisa bekerja di taman atau teras. Bila Anda tertarik untuk menginstal wireless router di luar ruangan, ikutilah ketentuan berikut ini.


  1. Carilah sebuah wireless router yang bisa digunakan di luar ruangan atau gunakan wireless router biasa yang dikombinasikan dengan bahan pelindung terhadap perubahan cuaca.
  2. Pilih lokasi yang terlindung dari hujan deras atau sinar matahari yang terlampau terik, misalnya di sudut atap bangunan.
  3. Lapisi wireless router tersebut dengan kotak pelindung.
  4. Hubungkan wireless router yang berada di luar ruangan dengan wireless router yang berada di dalam ruangan. Berikut ini ketentuannya:


  • Gunakan kabel untuk menghubungan antara wireless router yang berada di luar ruangan dengan wireless yang berada di dalam ruangan.
  • Pastikan Anda menghubungkan kabel tersebut dari arah luar ke arah dalam.
  • Gunakan ethernet port pada masing-masing ujung kabel tersebut.
  • Periksa power pada wreless router yang berada di luar ruangan. Bila kabel yang digunakan tidak mampu menyalur-kan listrik ke wireless router tersebut, gunakan kabel tam-bahan untuk menghubungkan wireless router yang berada di luar dengan sumber listrik.

5. Lakukan konfigurasi pada wireless router seperti halnya mengatur konfigurasi pada wireless router yang berada di dalam ruangan. Pastikan Anda memperhatikan hal-hal berikut ini.


  • Ubah nama wireless router (SSID) yang berada di luar ruangan sehingga sama dengan SSID wireless router yang berada di dalam ruangan. Ini akan memudahkan Anda saat bekerja di dalam ruangan dan ingin berpindah ke luar ruangan. Dengan cars ini, Anda tidak perlu melakukan reconnect pada kedua jaringan tersebut setiap kali berpindah.
  • Ubah channel wireless router yang berada di luar ruangan sehingga tidak menggunakan channel yang sama dengan wireless router yang berada di dalam ruangan. Untuk menghindari tabrakan, gunakan hanya channel 1, channel 6, dan channel 11.
  • Konfigurasikan wireless router yang berada di luar ruangan seperti yang berada di dalam ruangan sehingga memiliki tingkat keamanan yang sama.
  • Untuk menghindari konflik, nonaktifkan fitur DHCP pada wireless router yang berada di luar ruangan. 

Skema Jaringan Wireless yang Ditambahkan di Luar Ruangan
Skema Jaringan Diluar 

Memilih Access Point

Access point jugs dikenal dengan istilah wireless broadband router atau wireless router. Piranti ini merupakan salah satu piranti pokok yang harus dimiliki untuk membangun sebuah jaringan wireless. Saat ini, di pasaran tersedia banyak pilihan access point. Untuk memilih piranti access point yang tepat, pastikan bahwa piranti tersebut memiliki salah satu atau beberapa fungsi berikut ini.

Menghubungkan Komputer Berkabel

Sebuah access point yang memiliki fungsi switch akan memudahkan saat Anda ingin menghubungkan sebuah komputer ke dalam jaringan, balk dengan menggunakan kabel adapter maupun wireless adapter.

Menentukan Nama Komputer

Dalam sebuah jaringan, masing-masing komputer memiliki nama. Komputer dalam sebuah jaringan Internet akan mengirimkan data ke IP Address komputer yang dituju. Dengan mengaktifkan fitur DHCP, secara otomatis IP Address akan diberikan ke masing-masing kom-puter sehingga mereka bisa berkomunikasi.

Menghubungkan dengan Internet

Ketika sebuah modem broadband dihubungkan dengan jaringan wireless yang Anda miliki, secara otomatis seluruh komputer dalam jaringan tersebut akan terhubung dengan Internet. Pastikan bahwa perpaduan access point dengan DHCP dan kabel/DSL Router akan menghasilkan jaringan Internet nirkabel.

Menyediakan Firewall

Firewall merupakan salah satu komponen pengamanan yang bisa menjaga jaringan yang Anda miliki. Firewall ini bisa jadi disatukan dengan access point sehingga jaringan yang dibangun menjadi lebih aman.

Kombinasikan dengan Modem

Selain menambahkan kabel internet atau modem DSO ke dalam sebuah jaringan, Anda pun bisa memilih sebuah modem yang juga bisa berfungsi sebagai access point jaringan wireless. Dengan kombinasi ini, jaringan yang Anda buat menjadi lebih ringkas.


Tips Memilih Wireless Adapter

December 28, 2017 Add Comment
Bila ingin terhubung dalam sebuah jaringan wireless, Anda harus menambahkan sebuah wireless adapter pada setiap komputer yang akan digabungkan. Ada beberapa tipe wireless adapter yang bisa dipilih sesuai dengan kebutuhan.

PCI Card

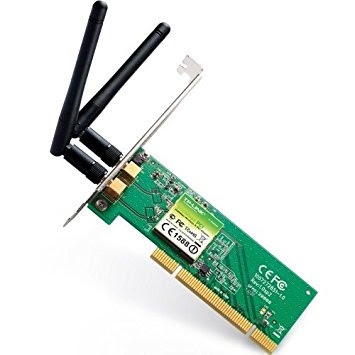
Wireless PCI card dibutuhkan untuk setiap komputer yang nantinya hendak terhubung ke dalam sebuah jaringan Wireless.

PCI Card
PCI Card


Notebook Adapters

Wireless notebook card diperiukan untuk setiap laptop yang nantinya terhubung dalam jaringan. Pastikan pula bahwa laptop Anda memiliki slot adapter untuk memasang notebook adapter tersebut.

Seiring dengan kemajuan teknologl saat ini, banyak laptop yang secara default telah dliengkepl dengan piranti Inl. Sebaiknya, pastikan terlebih dahulu keberadaan piranti ini pada laptop Anda sebelum rnembeli piranti notebook adapter secara terpisah.

Notebook Adapter
Notebook Adapter

Compact Flash Adapter

Compact Flash adapter Ini diperlukan oleh tiap-tiap laptop yang hendak terhubung dalam jaringan wireless. Pastikan pula setiap laptop memiliki CF adapter slot untuk memasang Compact Flash adapter tersebut. Namun, periksa terlebih dahulu keberadaan piranti ini yang mungkin secara default telah ada dalam laptop.

Compact Flash Adapter

IDE nach Compact Flash Adapter

USB Adapters

Tipe ini bisa dipilih bila komputer Anda memiliki USB Port. Tipe ini mudah dalam pemasangannya karena Anda tidak direpotkan dengan aktivitas membuka tutup komputer untuk memasang card.

USB Adapter
USB Adapter

USB Adapter
USB Adapter


Adversal Review: Scam or Legit, CPM Rates, Earnings, Payment Proof And Adversal Vs Adsense

December 28, 2017 Add Comment
We have already seen many reviews of good ad networks like Yllix Media, Ad-Maven, Revenue Hits etc. All those networks are really good and legit. Actually, we will never write the reviews scam ad networks.

Today, I am here with an Ad network called Adversal. I am going to write the adversal review, It's advantages and disadvantages and many other things about this network.

But, it isn't the time to dive into the article. We must check out some other things before reading this article. Adversal is also a very good Adsense alternative. Now let's know what is adversal.

What is Adversal?


Adversal Review: Scam or Legit, CPM Rates, Earnings, Payment Proof And Adversal Vs Adsense


Adversal is one of the best Adsense alternatives which was founded back in 2003 and within a very small time, it grew rapidly and got so many publishers and advertisers, making it a high paying ad network.


Many advertisers mean a good network which pays on time. Adversal is also a legit network. ( Hey, Hold on, it isn't the end of the article ). Now, let's dive in and check out each and every aspect of adversal.

Adversal Review: Scam or Legit, CPM Rates, Earnings, Payment Proof And Adversal Vs Adsense


Scam or legit


Adversal is not a scam. This network pays on time. No one really reported it a scam. That's why you can easily trust this network and I really recommend this network for everyone.

Sign up and Approval


Signing up doesn't need any special invitation or any other trash. You can directly head up to the publisher signup page and input all the details like Name, Username, E-mail and other details and click on signup.

Adversal takes 3-5 business days to approve or reject any application. Within 3-5 days, they will send you an E-mail regarding approval or rejection.

To get approved, Your blog or website must need some aspects, They are also called requirements :

1. Your blog must have original content. No legit ad network accepts blogs with copied content.

2. Your blog must receive a monthly traffic of 30,000- 50,000 pageviews. They officially said that they have minimum traffic requirement of 50,000 page views. But they will accept websites with lower traffic sometimes, But it is really rare.

3. Your blog must be malware, Virus-free. If your blog contains malware, they will reject your website.

4. Adversal won't accept any adult sites. If you have an Adult website, I recommend you to check out some other networks which accept adult traffic.


Quality of Ads


We must consider the quality of ads seriously. Because your visitors will be annoyed if they see any redirects or any other disturbances in the ads.

There are many ad networks which offer low-quality ads, but high rates. But never think of rates, Think of Quality and make your visitors happy.

Adversal ads won't contain any virus or malware. They don't have any redirects which mean, they have high-quality ads.

Rates


Adversal offers very good CPM rates for its publishers. They really monetize American traffic effectively. They pay higher rates for American traffic and pay lesser for other countries like India. But never think they pay very lesser.

The rates start from as low as $ 0.10 - $ 5. It is really a decent rate for banner ads ( Only pops get high payouts ). This is the important part of this Adversal review, as every one is interested in knowing about their rates.


Payouts


The minimum payout of Adversal is $20 and they pay via Paypal and Check.

They follow Net35 which means, you will get paid after 35 days of reaching the minimum payout of $20 and this is a major disadvantage of Adversal.

Adversal vs Adsense


In reality, No ad network can compete with Adsense. Because Adsense is an ad network owned by Google. That's why it has so much quality.

When it comes to rates, Both Adsense and Adversal pay same CPM rate. But when it comes to CPC rates, Adsense pays more. Because Adsense is a CPC network whereas Adversal is a CPM based network.

And when it comes to rules and regulations, Adversal is the clear winner. Because we all know that Adsense is the network of rejections and bans. They have strict rules and regulations which publishers must follow.

If anyone breaks one of those rules, He/She had to face a permanent ban from Adsense. In this Adversal review, This is a major advantage for them, as they have lesser rules when compared to Adsense.

Advantages :

1. Pays higher rates for every country. Some ad networks pay only higher rates for some countries.

2. Good and high-quality banner ads.

3. Legit ad network and a very good Adsense alternative.

Disadvantages :

1. High traffic requirements

2. Follows Net35 payout terms.

Conclusion

This Adversal review is written for publishers and I recommend publishers to start using them right away to get maximum benefit and higher rates and fewer bans ( Just kidding ). This is really a Legit and recommended ad network. And if you liked this review, then don't forget to share it with your friends.
List of Lists ... Seven

December 27, 2017 Add Comment
I did this last year, the year before, the year before, the year before, the year before and the year before ... I'm doing it again! (this is a list of lists of lists)

2017 has been kind to Red Sister!

Below are the 36 'Best of 2017' lists that I know of featuring Red Sister (presented in chronological order of publication). The two main reasons for assembling this list of lists are:

i) A thank you to the reviewers in question. It's a labour of love maintaining a book blog.

ii) You're probably here because you liked Red Sister. These reviewers (or in one case, these 200,000+ voters) appear to share your taste in one book, perhaps you will enjoy the other books on their lists.


Emma Lee Gough (mathematically it's still a list if it contains only one member)
The Audie Awards
Fantasy Book Critic
Library of Wonders
Reddit Stabby Awards
The Royal Library
Fantasy Book Cafe
The Tattooed Book Geek
Fantasy-Faction
Lynne's Books
Epic Grit
Laura M Hughes
Tome and Tankard
Grimdark Fiction Readers
Joseph Mallozzi's Weblog
The Bibliophile Chronicles
The Blogin' Hobgoblin
The Orangutan Library
The Grimdragons
Parmenion Books
Fantasy Literature
Reading Frenzy
Smorgasbord Fantasia
FanFiAddict
A Hair Past A Freckle
Books of My Heart
Book Geeks Uncompromised
Scifi and Fantasy Reviews
Pat's Fantasy 
Fantasy Book Review
You and I Books
Kristen Loves To Read
The Passionate Foodie
Quill To Live
Barnes & Noble 
Goodreads Choice Award for Fantasy 2017


Tips Memilih Mode Jaringan Wi-Fi

December 27, 2017 Add Comment
Jaringan wireless memiliki dua mode, yakni mode infrastruktur dan Ad-hoc. Mode Infrastruktur adalah mode jaringan yang menghubung-kan masing-masing komputer melalui sebuah access point pada sebuah jaringan wireless. Mode Ad-hoc adalah sebuah mode yang secara langsung menghubungkan setiap komputer melalui piranti wireless. Anda bisa memilih salah satu mode ini sesuai dengan kebutuhan. Berikut ini penjelasan lengkapnya.
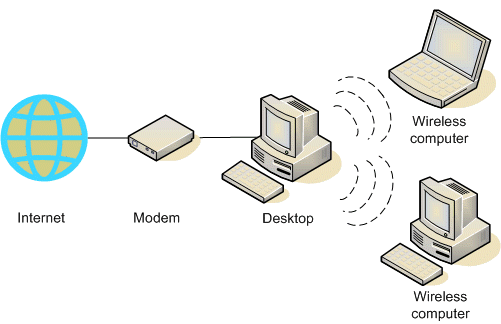
Mode Ad-Hoc

Ad-Hoc merupakan mode jaringan wireless yang sederhana. Pada mode ini, Anda tidak perlu menggunakan access point/wireless router untuk saling terhubung. Setiap komputer hanya perlu memiliki transmitter dan receiver wireless untuk saling terhubung secara langsung. Kekurangannya, komputer yang berada dalam jaringan dengan mode seperti ini tidak bisa berkomunikasi dengan komputer yang berada dalam jaringan kabel. Selain itu, daerah jangkauannya terbatas antara dua komputer yang memiliki transmitter dan receiver wireless tersebut.

Skema Ad Hoc
Skema Ad Hoc

Mode Infrastruktur

Pada mode infrastruktur, sebuah komputer yang berada dalam jaringan wireless bisa mengakses jaringan kabel atau berbagi printer. Pada mode ini, access point diperlukan sebagai pusat komunikasi utama pada jaringan. Access point/wireless router inilah yang bertugas mentransmisikan data pada komputer dengan jangkauan area tertentu.

Skema Mode Infrastruktur


Tips Memperoleh Sinyal Kuat Dalam Jaringan Wireless

December 26, 2017 Add Comment
Banyak faktor yang mempengaruhi kekuatan sinyal dalam sebuah jaringan wireless. Berikut ini beberapa faktor yang harus Anda perhatikan untuk memperoleh sinyal yang kuat.

Jarak dari Access Point dan Kekuatan Transmitter

Semakin jauh jarak dari access point, semakin lemah pula sinyal yang Anda peroleh. Sebagai contoh, Wi-Fi standar 802.11b memillki jangkauan 30.48 meter dengan kecepatan 11 Mbps hingga 91.44 meter dengan kecepatan 1 Mbps. Di luar ruangan, kekuatan sinyal sebesar 11 Mbps hanya dapat diperoleh pada jarak 18.29 meter.


Kemampuan Antena Access Point dan Wireless Network Adapter

Antena Akses Poin Grid/Parabolik


Antena Akses Poin
Antena Akses Poin

Masing-masing antena didesain dengan kemampuan yang berbeda-beda. Beberapa antena didesain untuk mengirimkan gelombang radio ke semua arah dengan merata. Sementara itu, ada pula antena yang hanya bisa memancarkan gelombang radio ke arah tertentu saja. Jadi, perhatikanlah spesifikasi access point dan kemampuan antena yang terdapat pada access point tersebut.

Jenis Material Dinding, Lantai, dan Atap

Beberapa material bisa ditembus oleh gelombang radio dengan cukup mudah. Namun, beberapa material seperti batu bats, air, kertas, logam, dan marmer akan memantulkan sinyal tersebut sehingga mengurangi kekuatannya.

Lokasi Client

Jarak Klien

Penerimaan sinyal jugs dipengaruhi oleh jarak antara access point dengan komputer yang digunakan seseorang dalam ruangan tertentu.

Perabotan Rumah

Perabotan di dalam rumah juga bisa mempengaruhi kekuatan sinyal karena bisa menghalangi sinyal tersebut, misalnya pintu logam, pips, dan sebagainya.

Objek Bergerak dalam Rumah

Kekuatan sinyal tidak hanya dapat terhalang oleh objek yang ditempatkan di dalam rumah, tetapi juga oleh objek yang bergerak seperti manusia.

Beberapa Access Point

Akses Poin
Akses Poin

Bila menggunakan lebih dari satu access point, pastikan Anda telah melakukan setting dengan benar. Bila tidak, gelombang-gelombang dari beberapa access point bisa saling bertabrakan atau saling mengganggu.

Tips Memilih Versi Wi-Fi yang Tepat

December 26, 2017 Add Comment
Wireless Fidelity atau yang lebih populer dengan sebutan Wi-Fl adalah nama yang diberikan untuk jaringan tanpa kabel/nirkabel/wireless oleh sebuah organisasi Wi-Fi.


Ada beberapa versi yang dikenal saat ini, yakni 802.11a, 802.11b, dan 802.11g. Versi-versi tersebut memiliki metode transmisi dan peneri-maan data yang berbeda. Berikut ini penjelasan masing-masing versi Wi-Fl untuk memudahkan Anda dalam menjatuhkan pilihan.


Memastikan Kesesuaian Antara Piranti Jaringan Wireless

Kesesuaian antara piranti wireless merupakan satu hal penting yang harus diperhatikan. Sebabnya, ada beberapa perbedaan standar wireless yang berlaku scat ini. Karena itu, pastikan Anda memilih wireless card yang sesuai dengan router yang telah Anda pilih.

Berikut ini beberapa hal yang perlu diperhatikan untuk memperoleh kesesuaian antar-piranti.


Kesesuaian Teknologi

Pastikan wireless card dan wireless router yang Anda gunakan memiliki frekuensi yang sama. Bila Anda menggunakan sebuah wireless card 2.4 GHz (802.11b atau 802.11g), piranti ini hanya bisa berfungsi dengan wireless router 2.4 GHz (802.11b or 802.11g). Wireless card tersebut tidak bisa berfungsi dengan wireless router 5 GHz (802.11a).

Pilihlah Piranti Bersertifikasi Wi-Fi

Pastikan Anda memilih piranti bersertifikasi Wi-Fi. Sertifikasi tersebut biasanya tercantum pada kemasan piranti. Anda bisa mencari infor-masi tentang piranti-piranti yang telah disertifikasi melalui alamat website www.wi-fi.com.


Gunakan Piranti dari Produsen yang Sama

Sebaiknya, carilah wireless card dan router dengan merek yang sama. Dengan cara ini, Anda akan memperoleh fitur-fitur khusus seperti Speed Booster.

Memilih Lokasi Penempatan Router yang Tepat

Salah satu hal penting dalam membuat sebuah jaringan wireless adalah menempatkan router pada lokasi yang tepat. Hal ini akan berpengaruh terhadap kelancaran akses dan keluasan cakupan area. Berikut ini beberapa hal yang bisa Anda perhitungan.

Dekat dengan Modem Broadband

Bila Anda berencana untuk menggunakan koneksi internet dengan beberapa komputer, posisikan wireless router dekat dengan modem DSL, satelit, atau kabel. Dengan posisi ini, Anda tidak membutuhkan kabel yang panjang untuk menghubungkan modem dan router.

Di Tengah Area

Setelah memutuskan area-area dalam rumah atau kantor yang akan masuk dalam jaringan wireless, carilah titik tengah area tersebut. Lalu, letakkan wireless router di lokasi itu sehingga setiap area akan memperoleh sinyal yang kuat dan merata.

Poptm Review: Scam or Legit, CPM Rate And Payment Proof

December 26, 2017 Add Comment
Popunders are the best alternatives to Adsense. There are many bloggers who use popunders, even though they got an Adsense approval. Why because Popunders pay very higher and some of them like Popads and Popcash offers guaranteed minimum rates like $1 for their friendly publishers ( Just joking all publishers are friendly to them).

So, today we are here with a new popunder ad network called Poptm. This Poptm review only is for publishers. If you are an advertiser, Visit another blog ( Hey I am too straightforward).

What is Poptm?

poptm review


Poptm is an Indian based ad network. They are completely unique and different in everything. Their unique design attracts all publishers and advertisers to join them. But these are not the best things about Poptm. They are very good at blocking the ad blockers.

Can't get it?

Yes. They are specialized at blocking the ad blockers.


Ad blockers are the main revenue effectors, which decrease the earnings of bloggers. But with Poptm, 90% of ad blocks will be bypassed. And this will increase your revenue by 30%. Hey, they officially said it louder. So let's see Poptm review.

Poptm Review: Scam or Legit, CPM Rates And Payment Proof


Scam or Legit

Hey guys, a small confusion here. Don't get me wrong. This is not a scam popunder ad network. But some people are making some rumors. But I don't think so. No one likes to create rumors.

But according to me, this is a paying ad network. And they have already paid many dollars for their publishers. So, no need to worry about payments. They will pay you. This is the main part of Poptm Review because many publishers want to check out that they are not being fooled by the network they are signing up for.

Sign up and Approval

Getting Adsense approval for Google Adsense is very hard. But getting approval for Poptm is very easy.

All you need to do is visiting their website and sign up using the registration form. After that, you are able to login to your account. Then add a website and to get approval, you need to add a piece of code ( Meta tag ) in the Head section of your template and PopTm review your blog and approve it. So Poptm is very good CPM ad network for small publishers.


Ad Formats

This is a pop ad network. All it can provide are CPM ads which are popunders. Here are some ad formats provided by Poptm

Normal PopUnders: These are normal pop-unders. They open in a new window and even though the visitor closes it, it will be counted as an impression.

Ad blocking ads: These are also Popunders. But they are special. Generally, many ad networks fail to bypass the Ad blockers. But Poptm ads will bypass ad blockers and you will get revenue even the visitor using an Ad-blocker plugin. This makes this PopTm review even more effective because it is their specialty

Rates

This is not a CPC ad network, so don't expect anything for clicks. There are no clicks at all. All are impressions. But the CPM rates of Poptm are very good. They pay an average CPM of $0.5 - $5 sometimes. Think once, $6 for 1000 visitors. If you get 5000 visits per month, you can make $30 per month. The rates are very good and outstanding for small publishers and new blog owners.

Payments

The minimum payout of Poptm is $10 and it is very easy to draw your first payment to your PayPal account. If you don't have a PayPal account, They still offer Bank Wire transfers too. Receive your payments through bank transfer.

Payment Proof

Payment Proof - Here

Conclusion

This is the poptm review for publishers. If you are an advertiser, surf another site like monetizepros. They write for advertisers too.

If you like this article, just share it with your friends on Facebook and Twitter or Google Plus and help us to improve our blog. Thank you and subscribe to our blog to get the latest reviews of Ad networks.